
In my previous blog, we deployed a very simple scenario using Terraform.
In this blog, let’s get to a bit more next level where we implement VNet Peering between the two virtual networks and we’ll also utilize Azure Key Vault to access our Virtual Machines through secrets rather than keeping the credentials in our code & absorbing them through variable definitions which is NOT an ideal way of restricting the resource’s access
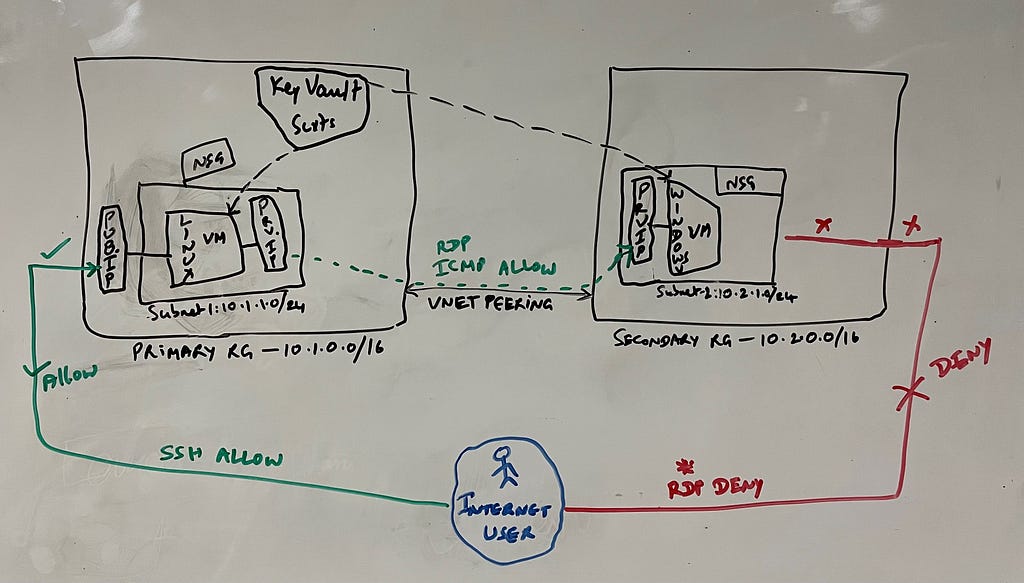
How does our Architecture look like and What do we need to build ?
Below is the pictorial representation of our goal and let’s keep an eye as we progress with our implementation
A picture in mind always helps 😉
In order to achieve the above, we need to first break down things in to small pieces — Let’s do that and break in to as small steps as possible like below [Remember that these/each step[s] can be further more granularized but for simplicity I’ve limited to ‘10’]

Let’s begin the fun and make our hands a bit more dirty than before 🙂
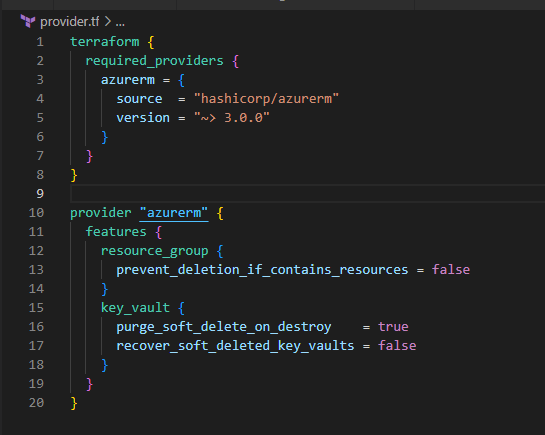
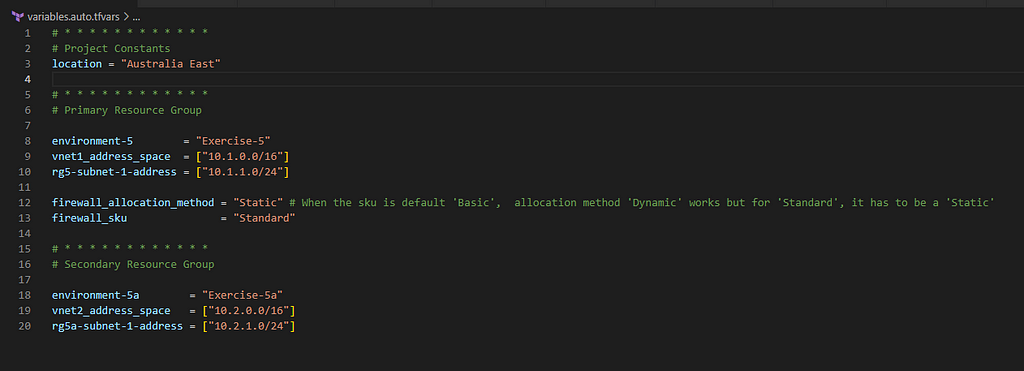
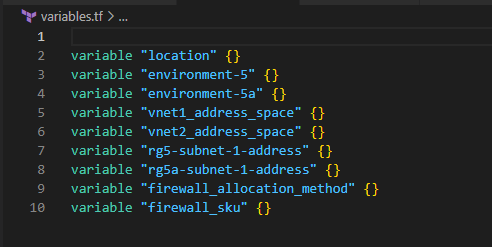
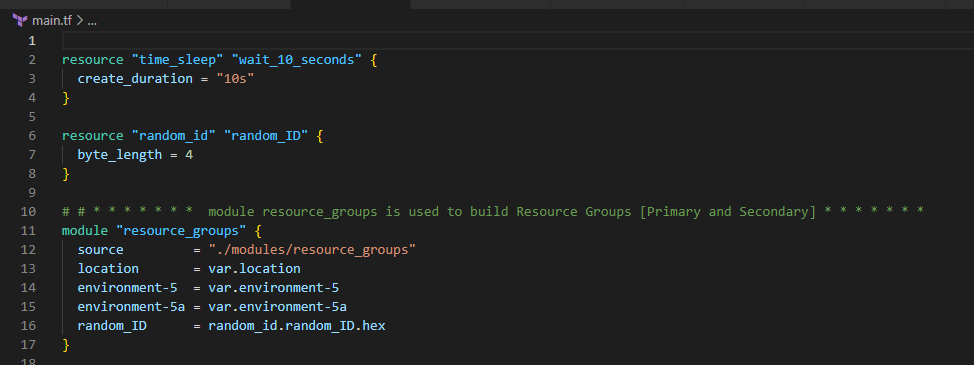
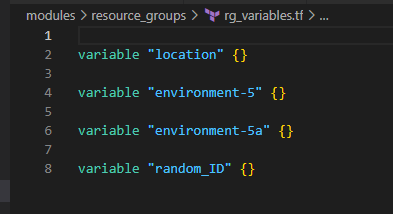
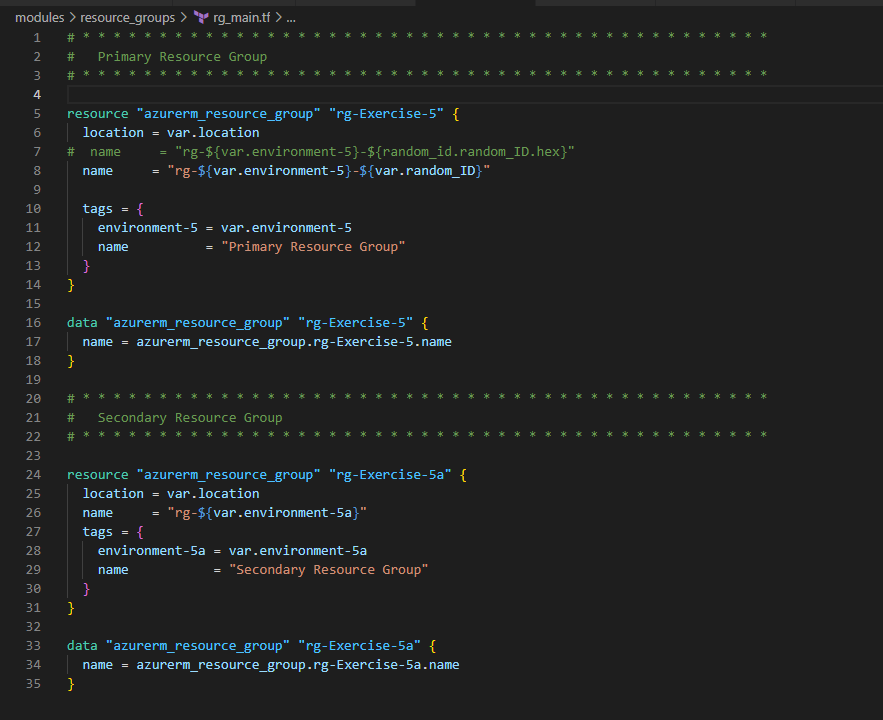
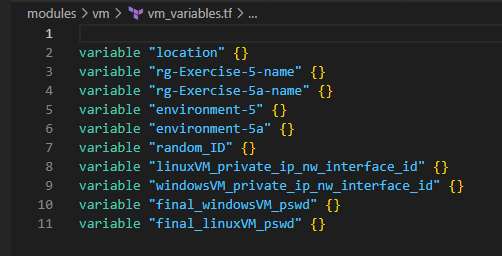
Build the basic Terraform Folder Structure


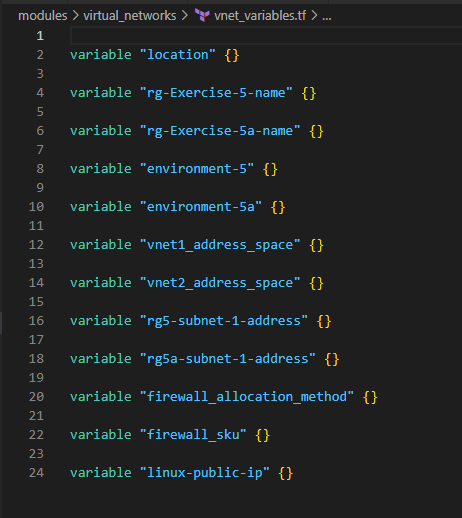
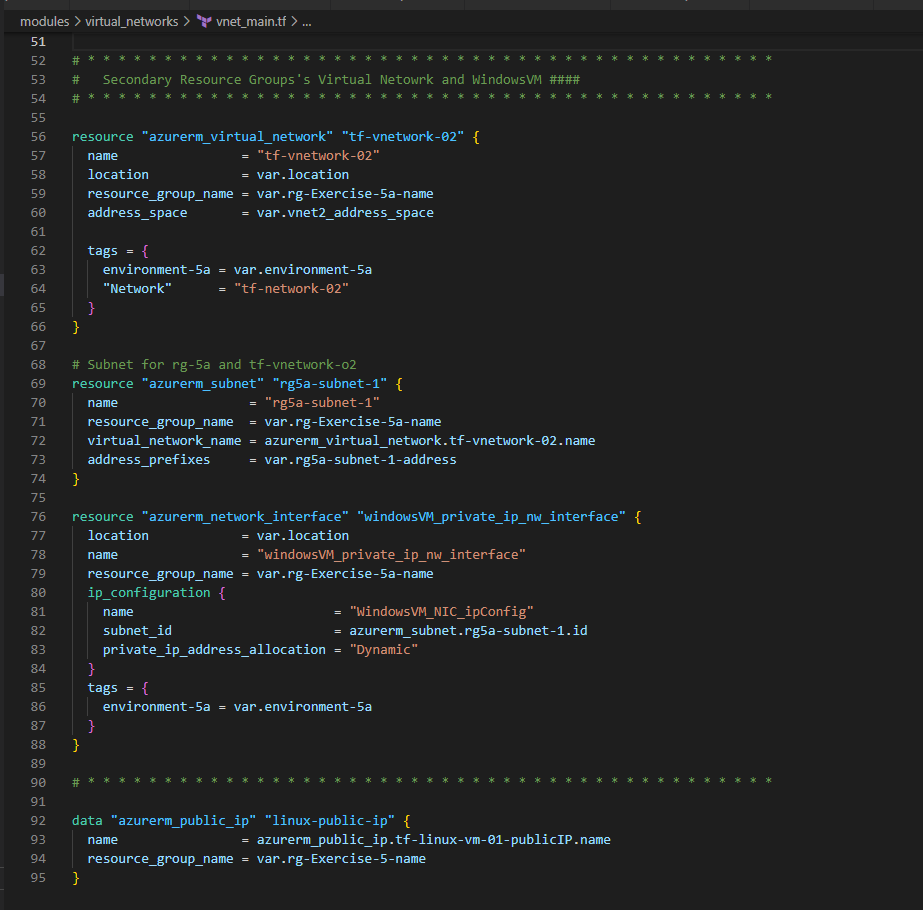
2. Create a VNet and a Subnet in each Resource Group
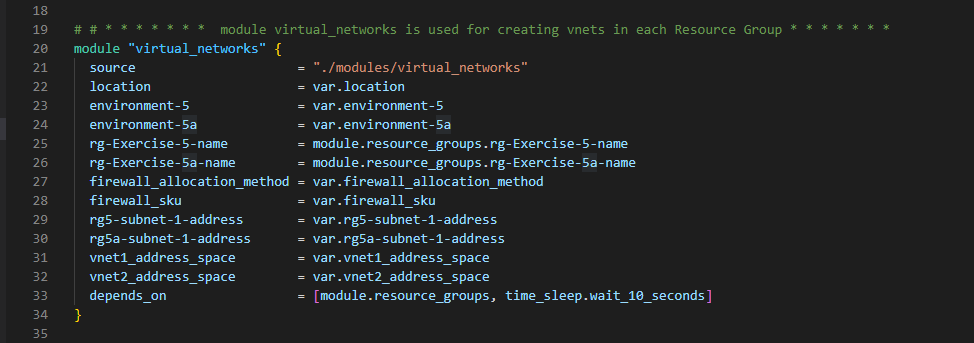
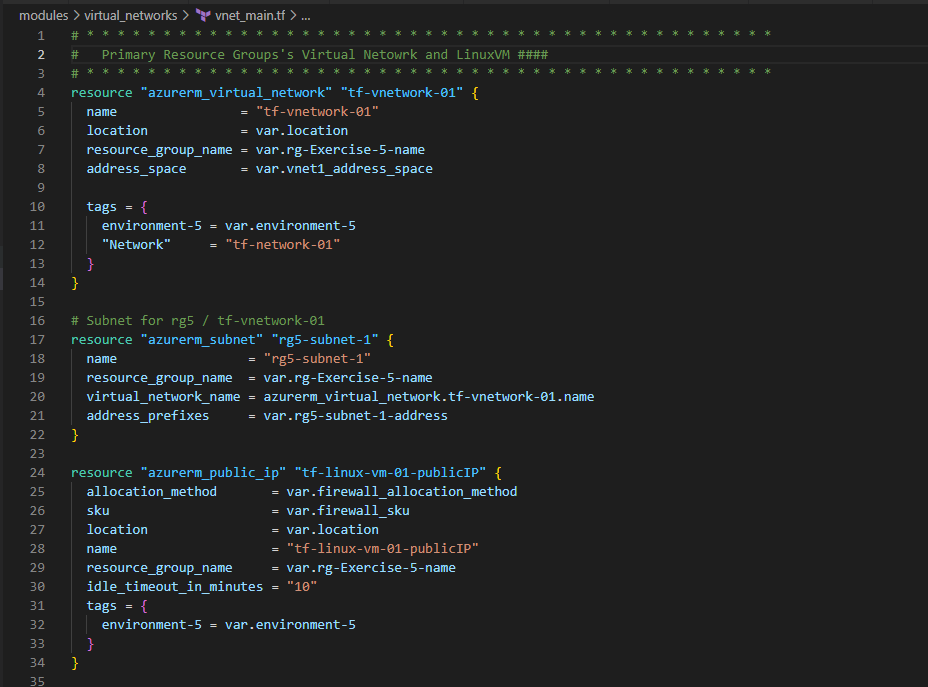
In the above, we are also creating a Public IP which will be associated with the LinuxVM [we will deploy that in the later section] for public access

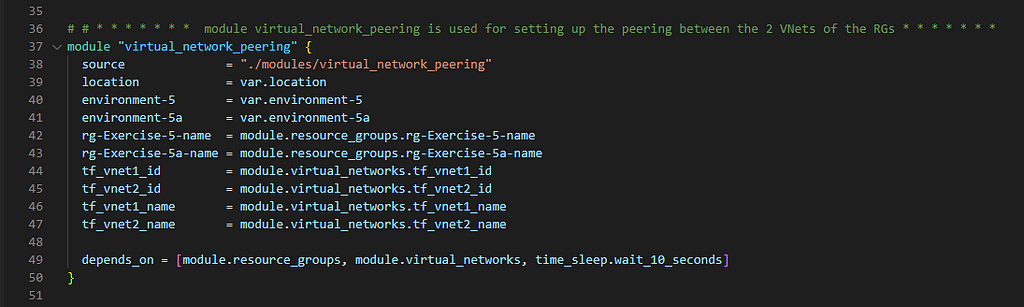
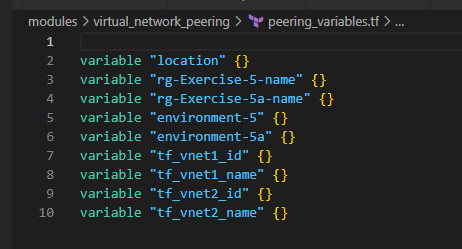
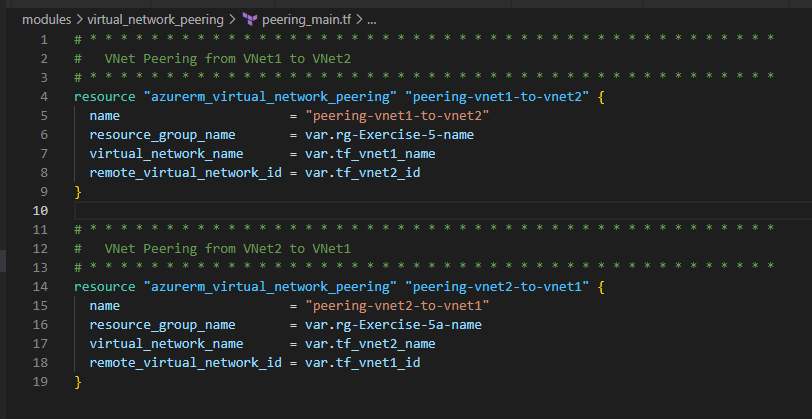
3. Implement VNet Peering between the two Virtual Networks

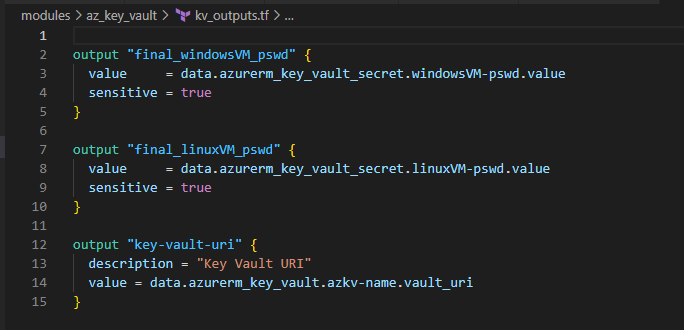
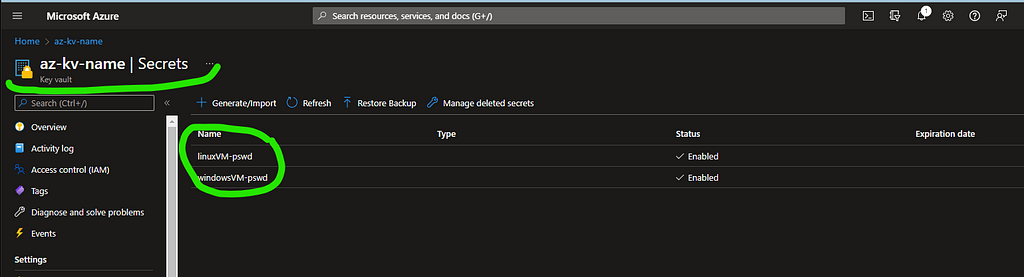
4. Use Azure Key Vault and create Secrets for the LinuxVM and the WindowsVM

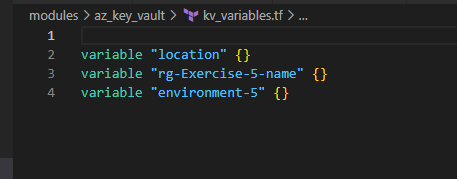
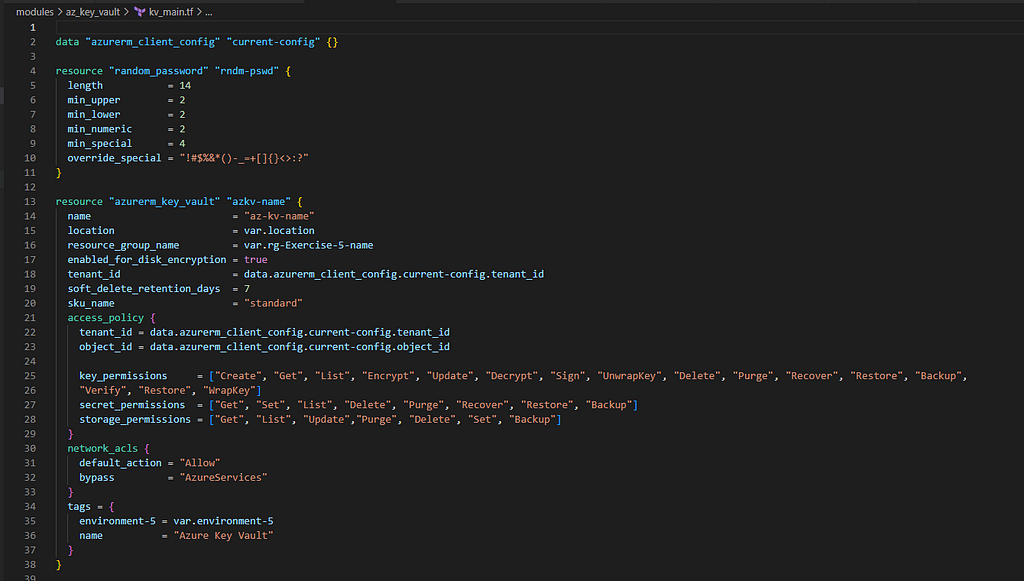

Let’s understand a bit about key_vault section under providers.tf as we pointed in our earlier section of this blog


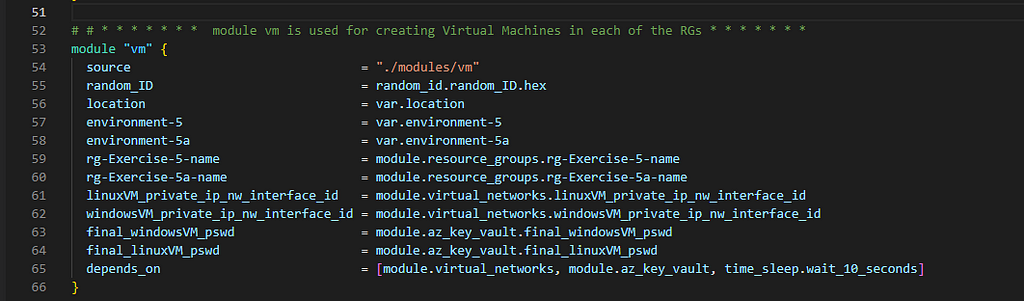
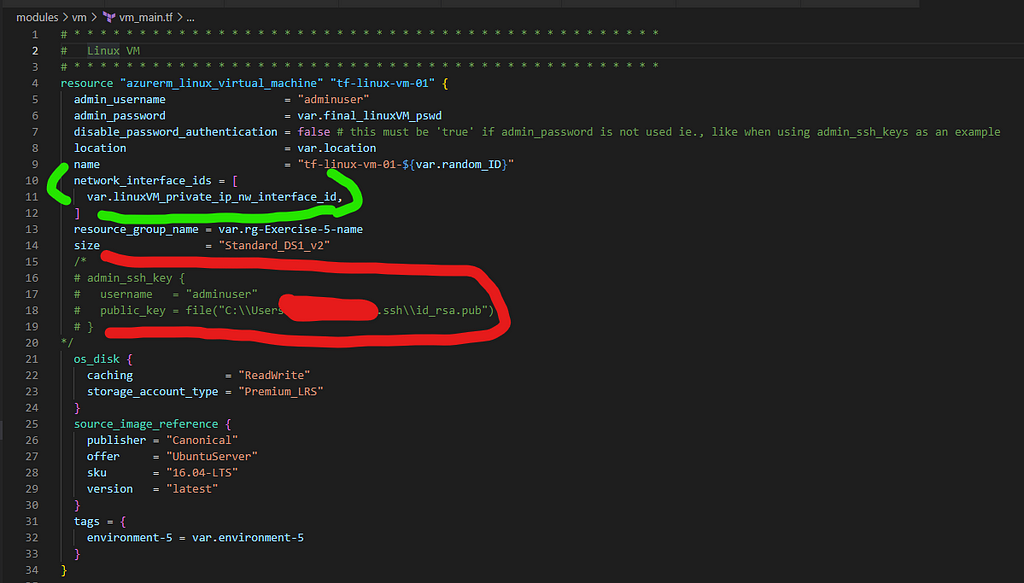
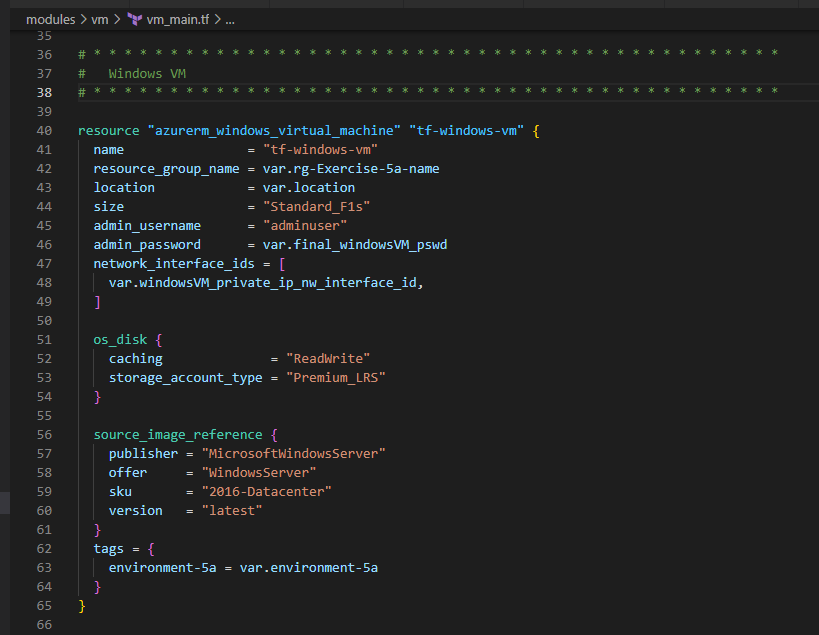
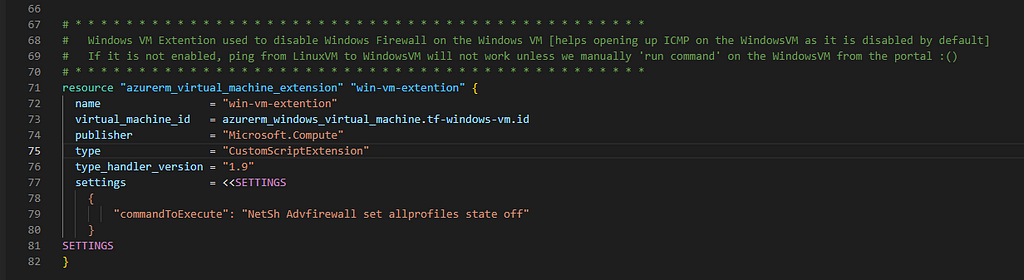
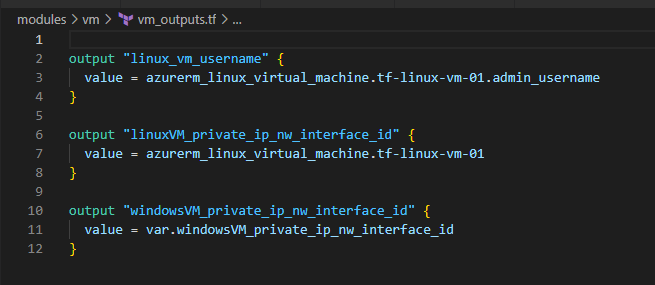
5. Deploy LinuxVM [in Primary RG] and WindowsVM [in Secondary RG]
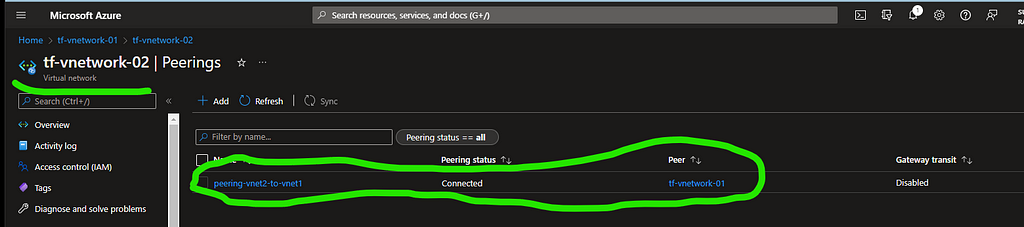
I think we’ve come good far in building the infrastructure we need through Terraform. Take couple of mins break and then deep delve in to the Azure Portal to see how your resources are showing up to understand the configurations between them and how they got tied through applicable parameters
It’s good time now for a break and relax before we implement the traffic rules

Let’s get back to the business
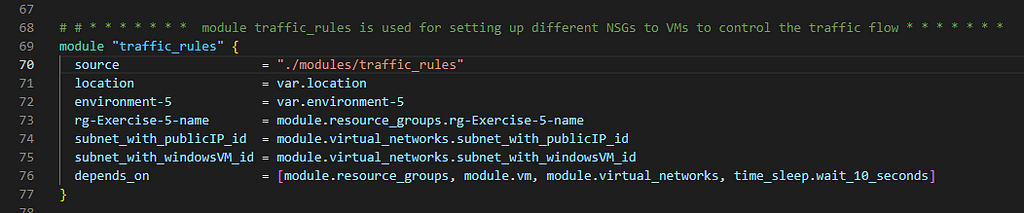
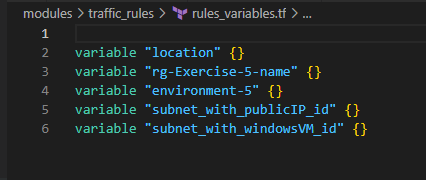
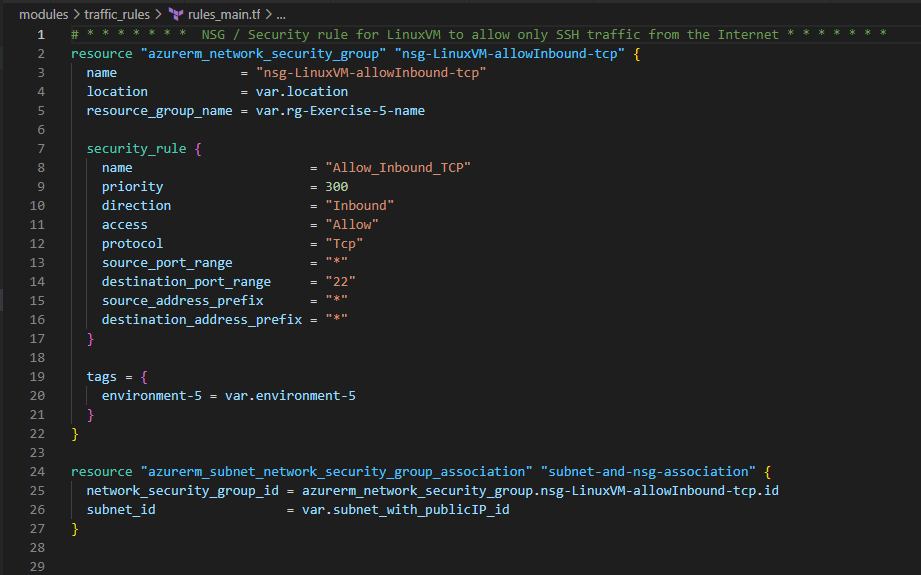
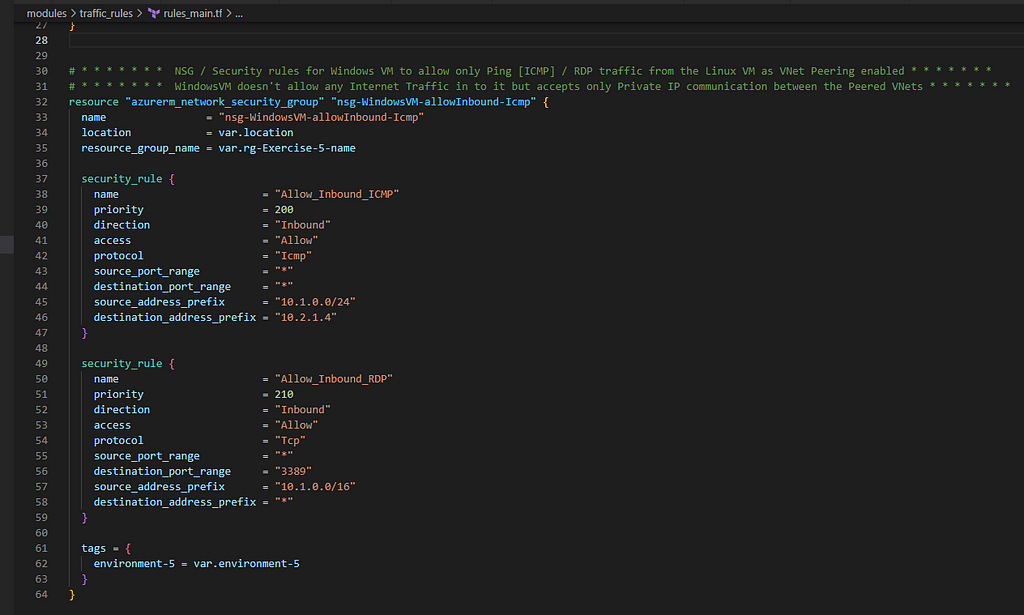
6. Define Traffic Rules for the LinuxVM and WindowsVM
— Limit and allow the Internet Access to LinuxVM through SSH
— Limit and allow the ICMP access to WindowsVM from LinuxVM and RDP from Peered network only
Now perform terraform init, terraform plan and terraform apply –auto-approve one after the other successful command execution. I encourage you to also use terraform validate and terraform fmt commands and fix any errors by following the blog carefully
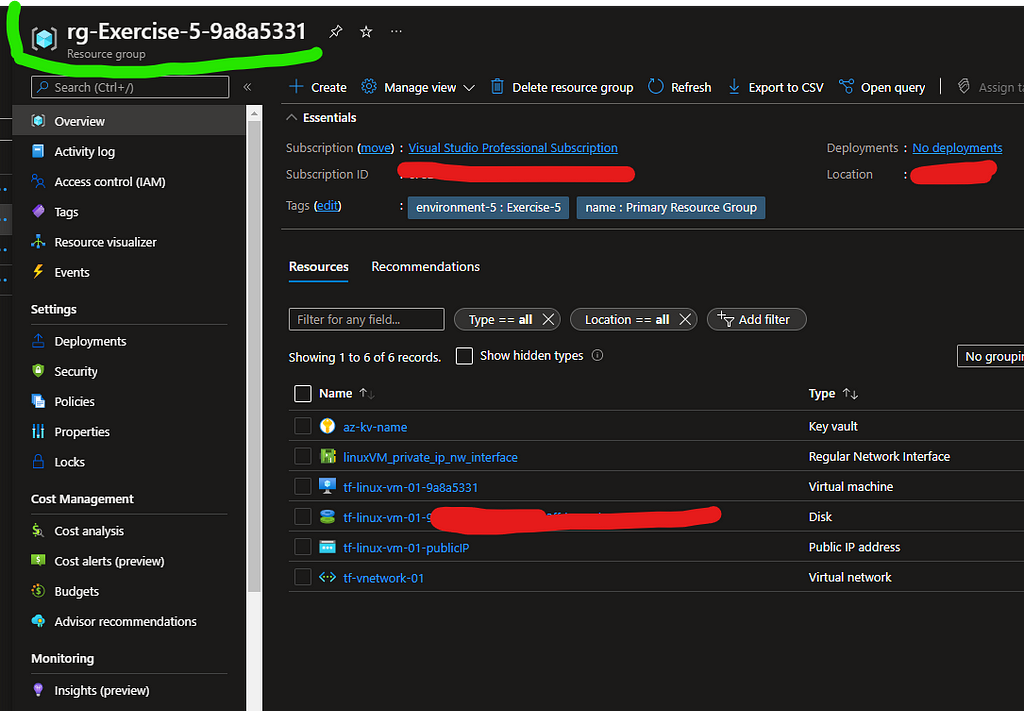
With this, the deployment of resources is complete can be observed in your Azure Portal

Let’s now test the access to our LinuxVM and WindowsVM and confirm the behaviour
— From the terminal from your local machine, perform ssh adminuser@LinuxVMPubIP [use the LinuxVM Public IP appearing in your Azure Portal in place of LinuxVMPubIP] and use the linuxVM-pswd from the portal as admin_password to login to the LinuxVM. You should be able to login successfully

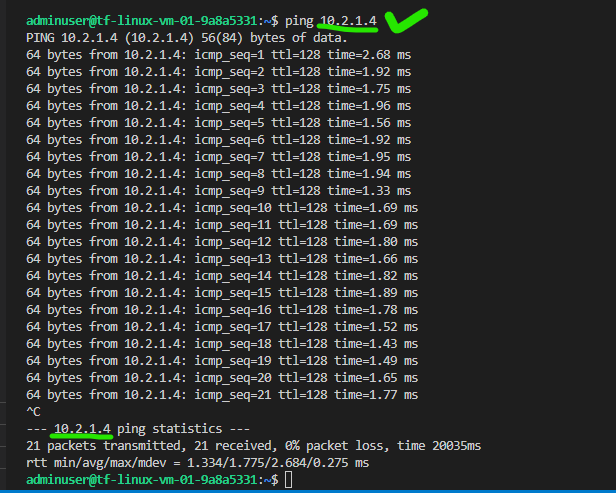
— Ping to WindowsVM from LinuxVM. Using the WindowsVM Private IP address [note down this IP address from your Azure Portal] and use ping WindowsVMPrivateIP to check whether it is working properly as shown below
— Try to RDP in to this WindowsVM frm your local machine using any of the RDP tools. You’ll be unsucessfull to do as the WindowsVM is expected to accept only the requests from the Peered Network resources
Finally perform terraform destroy –auto-approve to destroy all the resources in the Azure Portal to free up consuming the $
That’s it and You are now done with this scenario 🙂
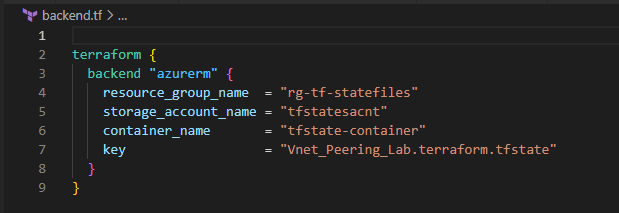
Full code can be accessed from here — https://github.com/ramakb/VNet_Peering_Lab
Hope you find this information helpful.
Thanks for taking time to read!