+61 (0) 481355646
reply@assureditinfra.com.au
Victoria, 3029 Australia
Follow On:

As I started playing with Azure using Terraform, thought of sharing my hands-on learning through a blog about how to create and deploy a simple Linux VM using Terraform. Along with it, we’ll also control the traffic to that VM through a simple NSG Rule and associate it with the subnet in which we’ve this VM – that way we protect the VM rather than opening all the ports to the public access. We’ll also use storage account/container to store the boot diagnostics of the VM
To be frank, nothing fancy in this blog as the intention is to begin with some basic fundamentals
I’ll try to build more complex modules in the upcoming blogs to get in to more advanced levels. Fingers crossed!
Let’s begin our journey of “Basics with Terraform & Azure”
Example: setx SubscriptionID “yoursubscriptionID” Please refer here for more information
2. In the Azure Portal, Manually
3. On your local machine,
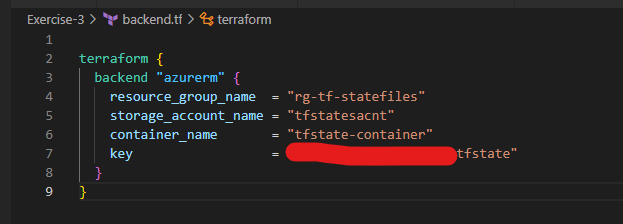
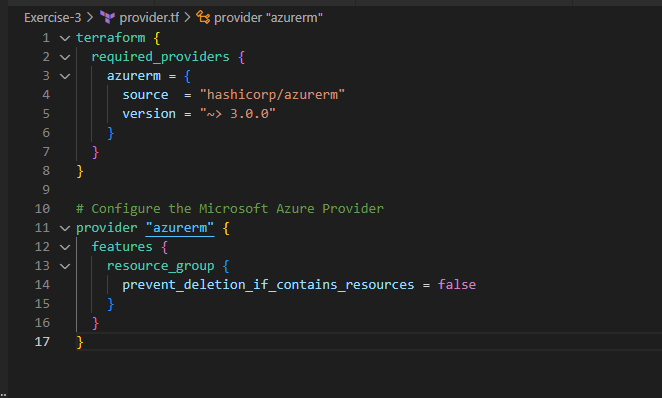

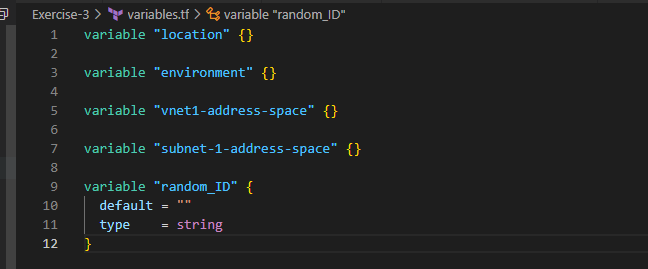

After saving all these files, Open the terminal in the VSCode and perform below actions to initialize and execute your terraform project code
terraform init and observe the changes in the folder ‘Exercise-3’
terraform plan and observe the console output and understand
terraform apply –auto-approve
After this is successfully executed, open your Azure Portal and see the changes. You should be able to see the Resource Group listed in your Azure Portal
Please refer here for more insights about what is the purpose of each of the above commands. In addition to the above commands, terraform fmt and terraform validate are pretty useful too. Explore about them and understand how they help
4. Now, it’s time to do little more like creating the Virtual Network, Subnet and actually deploying the Virtual Machine in to that Resource Group. I’m using the concept of terraform modules here. If you’ve never explored about this concept, I highly encourage to read this blog
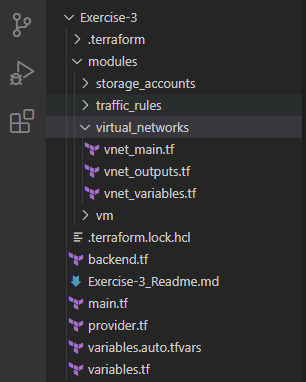
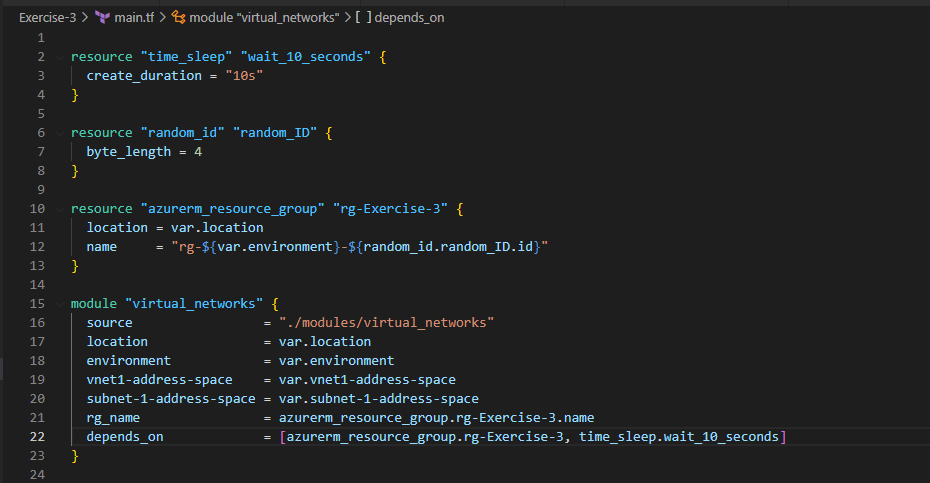
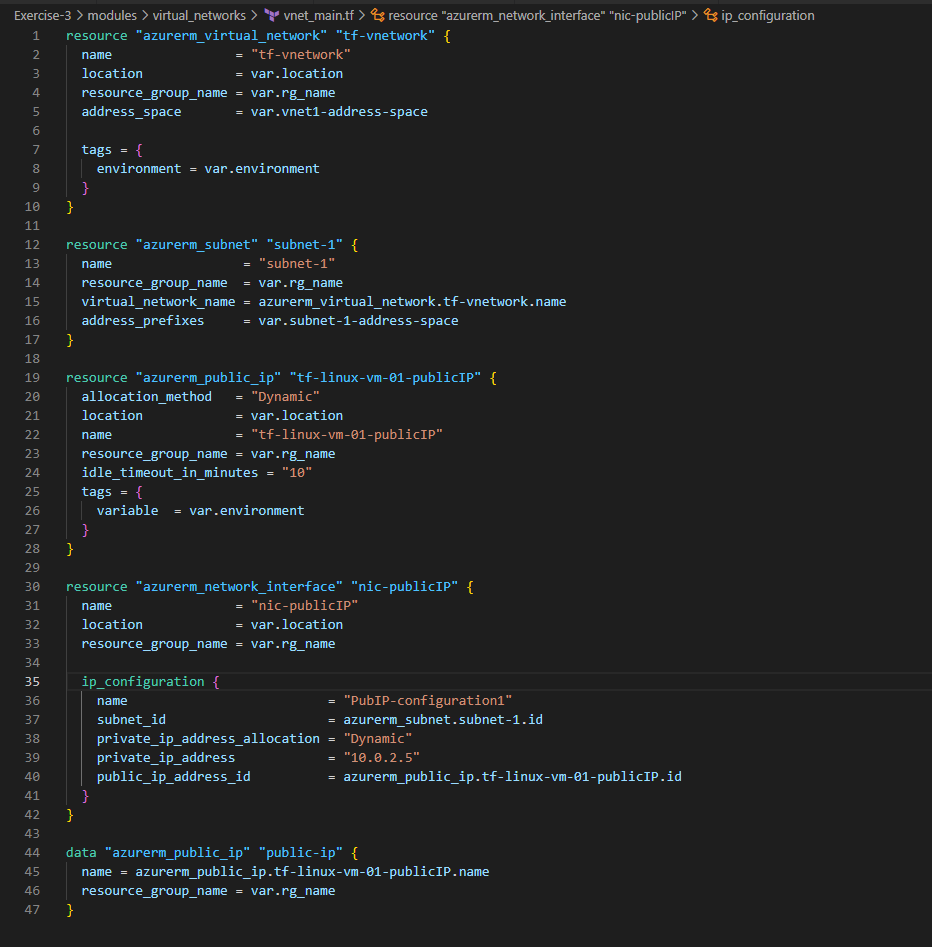
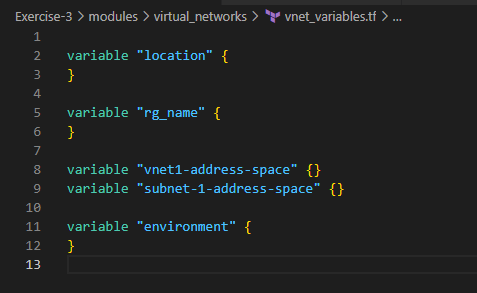
See below the different .tf files under virtual_networks module. vnet_outputs.tf outputs from this module will be consumed in other modules such as traffic_rules as per the needs in the following sections
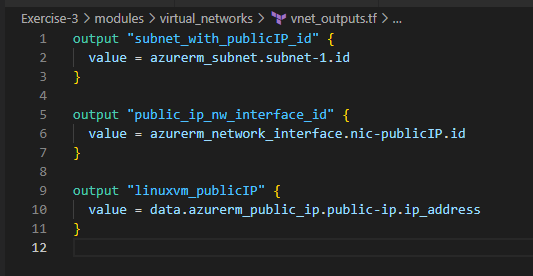
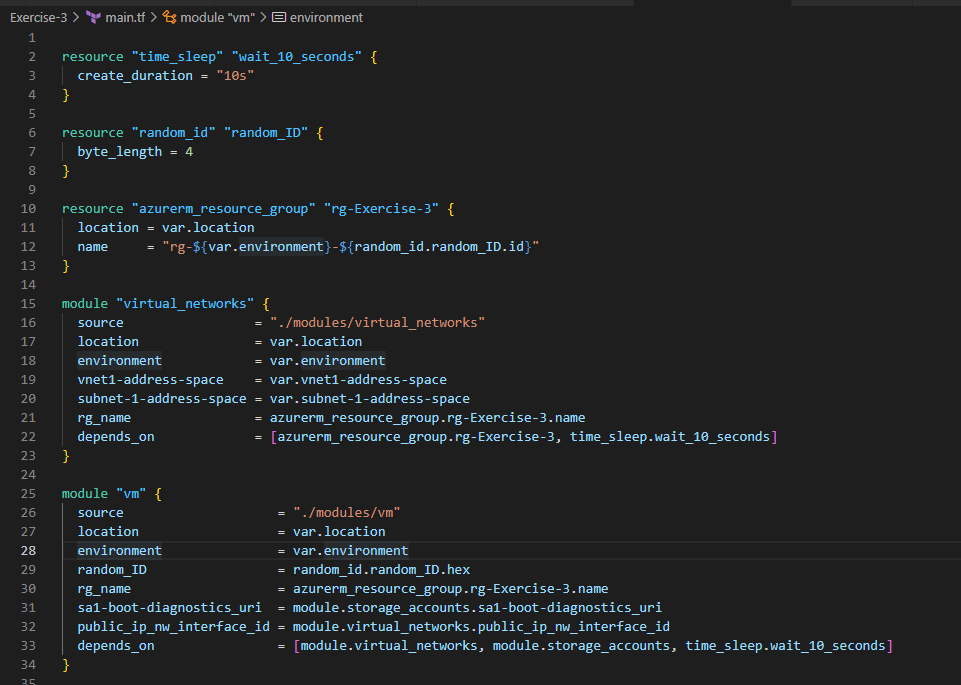
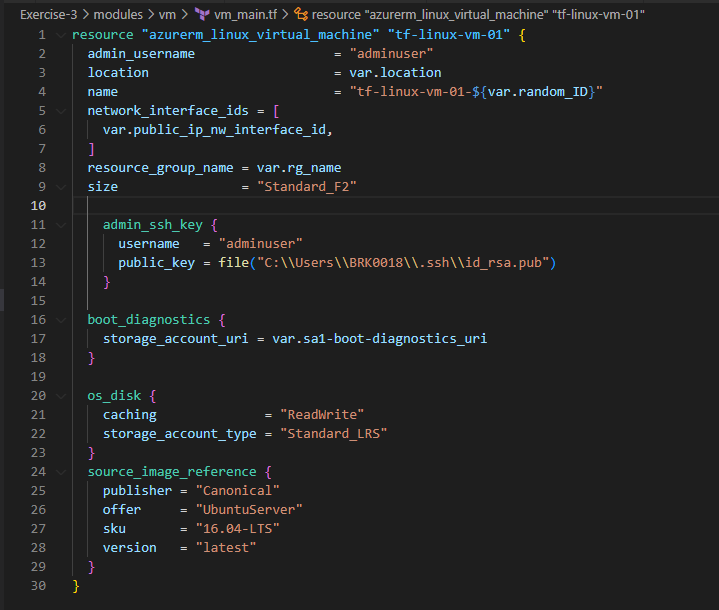
Let’s create vm_main.tf, vm_variables.tf and vm_outputs.tf files under the vm module folder created earlier. The code snippets in those files looks like below

5. Let’s create some traffic_rules to only allow specific Inbound traffic to our vm
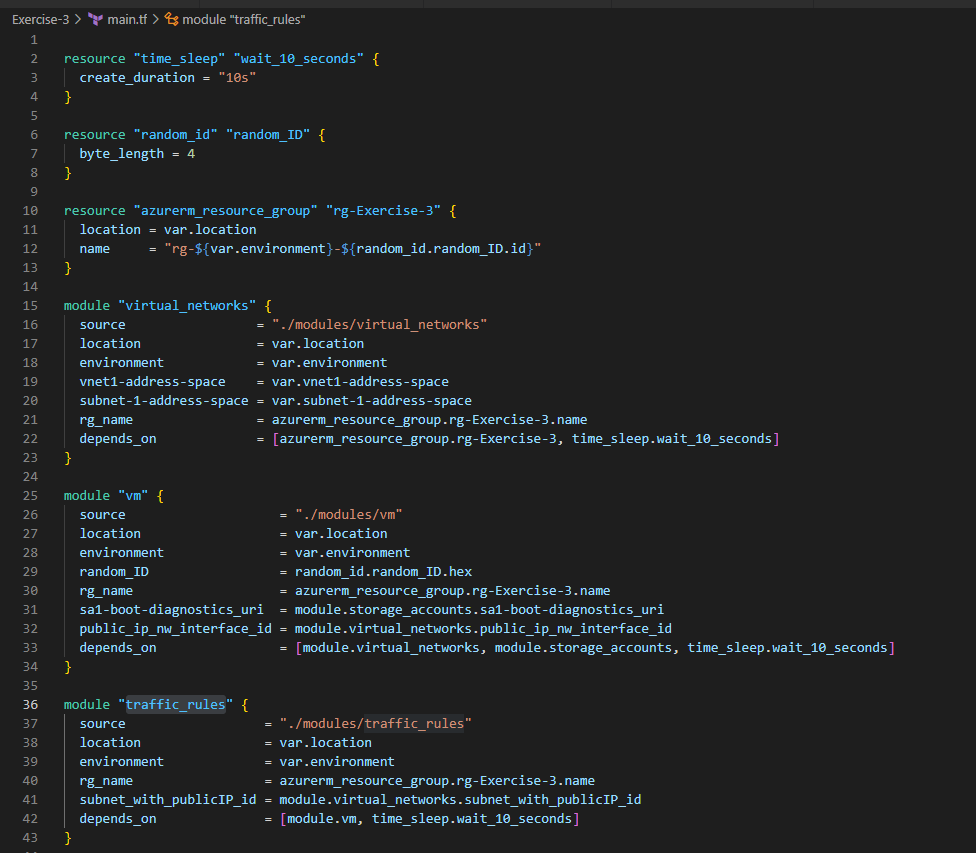
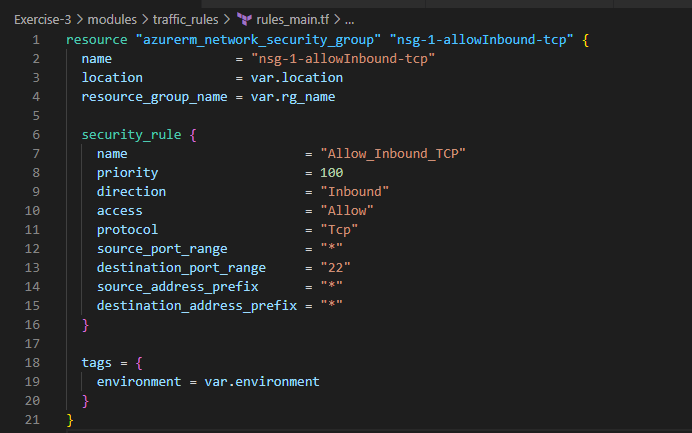

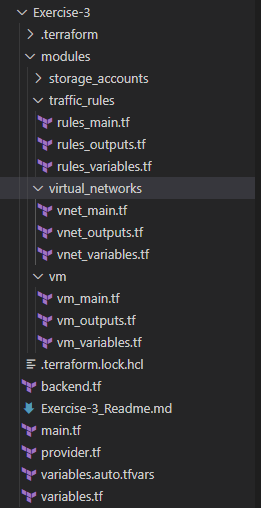
6. Let’s capture the boot_diagnostics of the vm we wanted to deploy through this exercise. We’ll use storage_accounts module to fulfil these needs as shown below


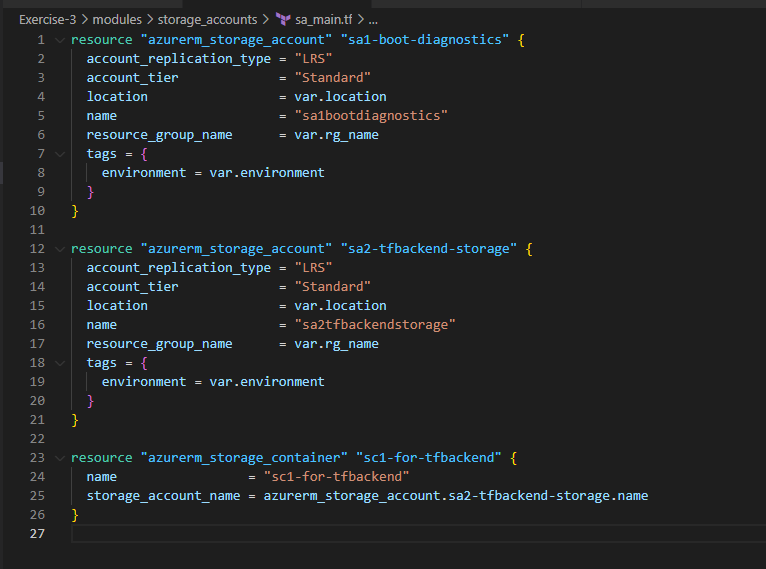

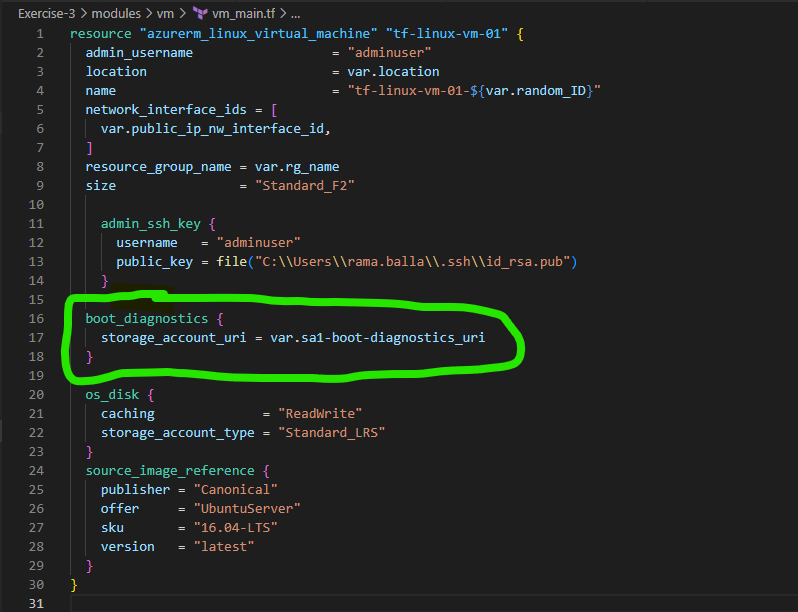
Now, Let’s run
terraform init, terraform plan and terraform apply –auto-approve. After successful deployment, You should be able to see all the resources in the Azure Portal successfully like below
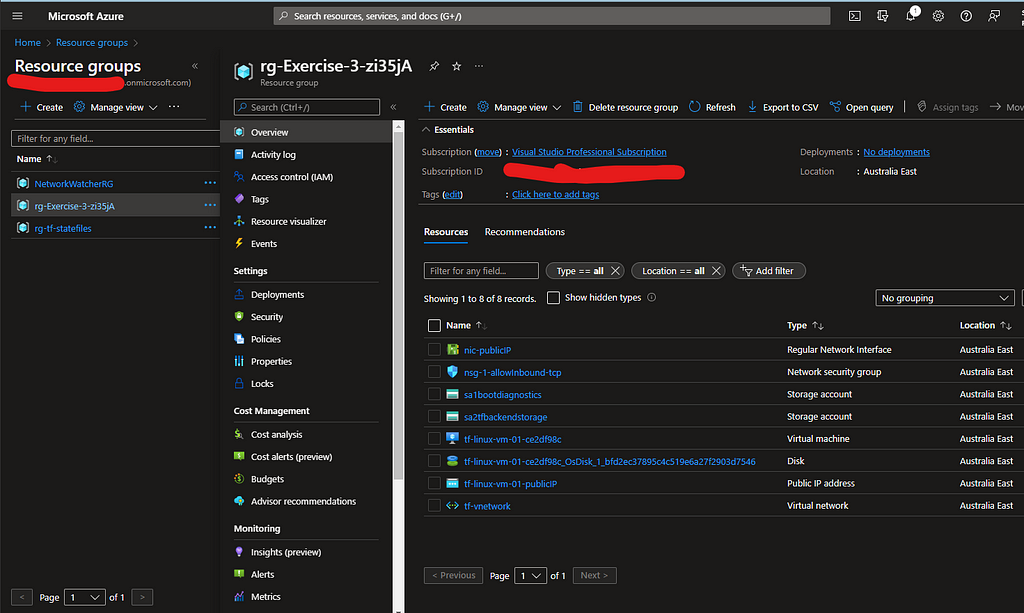
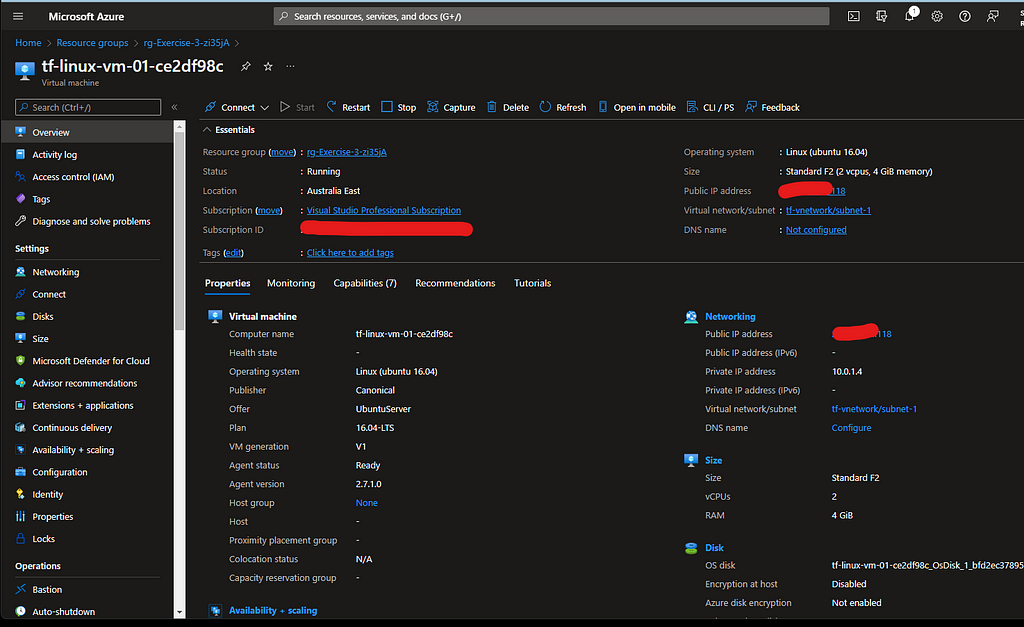
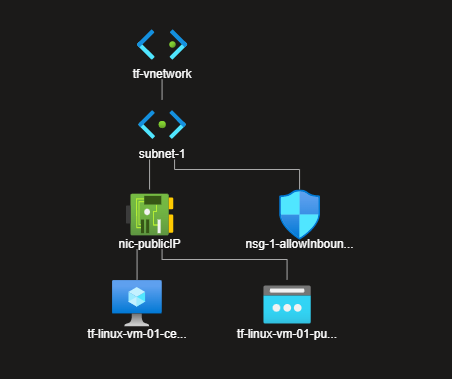
Vnet Map looks like below

ssh adminuser@pubIPofyourVM once successfully logged in, use this to install the nginx server on to that VM. Once you made the server up and running, open any browser and try to access it using http://pubIPofyourVM and you should be seeing the nginx server welcome page like below
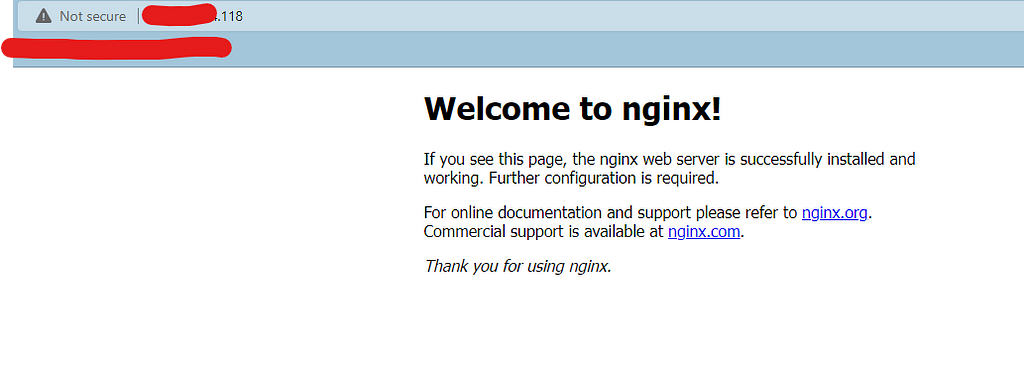
Notice that you are able to access your VM through port 80 as there are NO restrictions applied yet to your Inbound traffic to the Linux VM. Hence you are able to access it through browser without any traffic blocking
Also try to ping google.com from your VM ssh session. It should be successful to ping as well as Outbound traffic from your Linux VM is allowed too
Let’s associate the NSG rule we’ve created in the rules_main.tf code with the subnet now such that we only allow Inbound access through port 22. Now your rules_main.tf should be updated like below
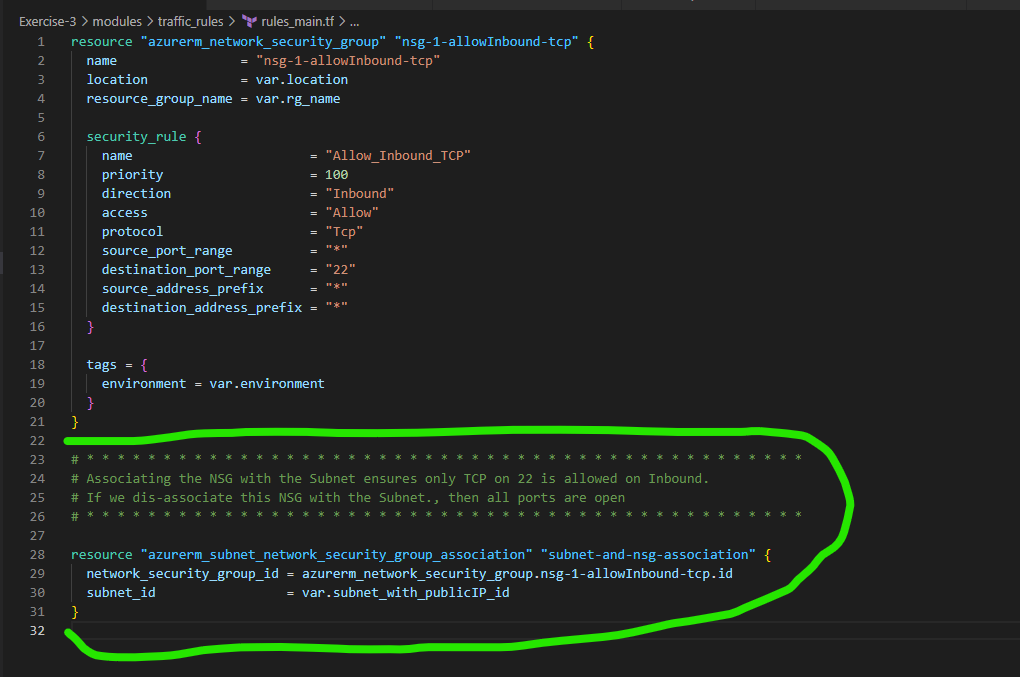
After the save, perform terraform init, terraform plan and terraform apply –auto-approve to see the changes as intended on your resources
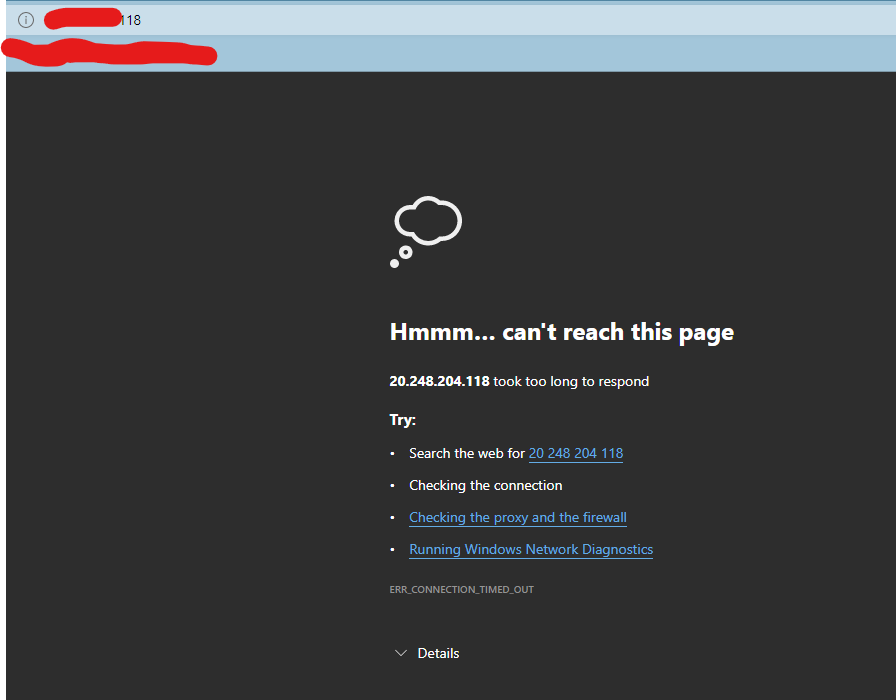
Now, if you access http://pubIPofyourVM, shouldn’t be allowed as only Port 22 is acceptable. Hence, you should be still able to ssh in to that machine from your terminal and able to ping google.com as Outbound traffic from the VM rules are unchanged. And now observe the your Vnet Topology in the Azure Portal
You can browse through the Storage Account/Container in the Azure Portal for the boot_diagnostics logs and confirm that they exist as per the expectations
With this, the deployment of the Linux VM with NSG rule and Boot Diagnostics is completely successfully
Finally perform terraform destroy –auto-approve to destroy all the resources in the Azure Portal to free up consuming the $
That’s it for now!
Hope this information finds useful.
Thanks for taking time to read!